


How To Create A Beautiful Scrapbook Spread

Scrapbooking is like a magical journey that turns your ordinary moments into unforgettable memories!
With just a photo or a ticket stub, you can create stunning scrapbook spreads that capture the essence of your experiences. It's a fun and artistic outlet that lets you relax and unwind. Plus, who doesn't love an excuse to indulge in washi tape and adorable stickers?
So, let's dive into this tutorial and create something beautiful to treasure for years to come!
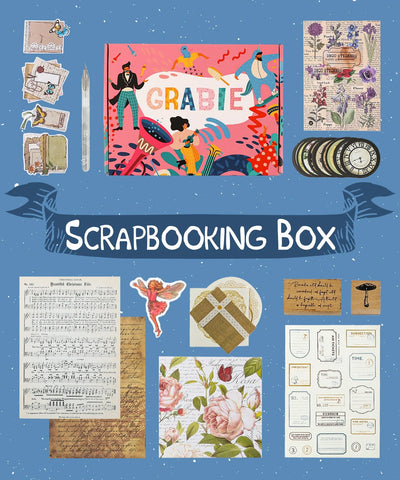
Thanks Roise for such a lively video! In this tutorial, we will follow her, and use the Grabie scrapbook box which contains:
- 6 full-size sticker sets
- 4 full-size material paper sets
- 1 pc vintage gold book clip
- 1 sheet clear silicone stamp
- 1 pc ink pad
- 1 pc storage pouch
- 1 pc craft knife
- 1 roll retro text washi tape
- 1 sheet of 3D white pearl stickers
List of Supplies:
Step 1: Choose Your Theme
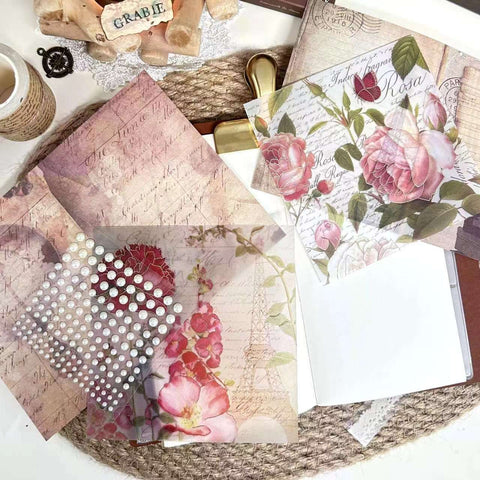
First things first, let's choose a theme for our scrapbook. It could be based on a recent interest or experience that you want to cherish forever. For this tutorial, Roise is going with the Flower and Fairy theme. Next, choose a background and complementary paper that best matches your desired style. Roise went with a white material paper with text all over it to highlight the flowers. But you can get creative and choose whatever paper speaks to you!
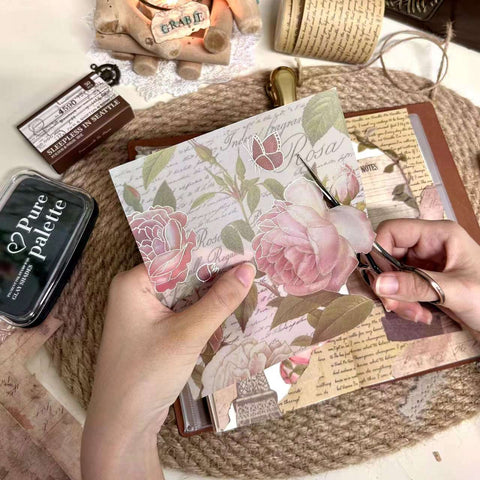
Step 2: Cut The Paper
Now, let's cut the paper into the desired shape. You can tear it by hand for some unique textures or use scissors or a carving knife to get the desired pattern. Just be careful with delicate flowers!
Step 3: Decide on a Basic Layout
Using your adhesive Tape Roller, attach the material paper to your spread. You can arrange them in a grid pattern or create a more organic layout. Don't forget to add some stamped elements to your spread using our clear silicone stamp and ink pad.
This will make your spread less monotonous and more interesting!
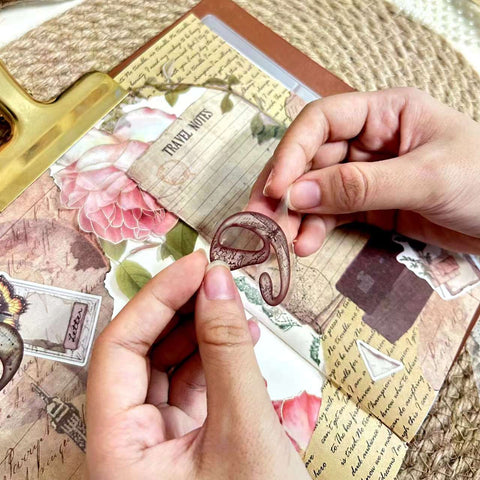
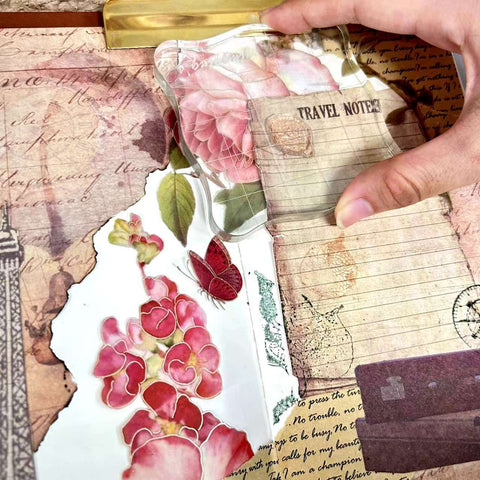
Step 4: Add Stickers and Washi Tape
Now it's time to add some personality to your scrapbook spread. Use our full-size sticker sets to add fun and colorful elements to your spread. Create a title for your spread using letter stickers or add decorative elements such as flowers or stars. Roise selected some small retro items and added flower fairy stickers to make the picture more romantic. You can also cut text tape into irregular shapes to add some texture and interest to your spreads.
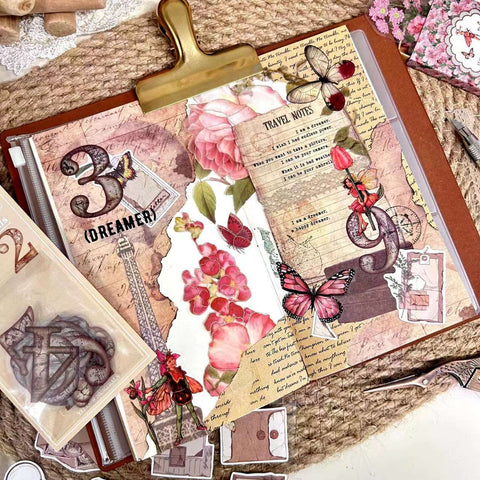
Step 5: Add Your Embellishments
Finally, let's add some embellishments to make your spread more meaningful. Add a date, a quote, or a special message using your stamp. Write an essay or diary entry to record your thoughts&feelings.
This will give your scrapbook spread more content and make it even more special!
Congratulations on creating a stunning scrapbook spread using the materials provided in our versatile box. Scrapbooking is a wonderful way to relieve stress, so don't hesitate to explore and experiment with our new techniques. Let your creativity flow and enjoy the art of scrapbooking!
Follow Roise's video to learn How To Create A Beautiful Scrapbook Spread.


